Essential Guide to Successful Lighting
Good lighting is an important part of the Armadillo experience. We seek to keep low-lit aisles and dark ceilings so that effective individual booth lighting can add a higher level of quality to the visual appeal of the show.
The goal is not simply to make each booth brighter. The goal is to create focused, comfortable lighting that helps the artwork glow while preserving the warm, cozy, softly lit ambiance that adds charm to the room and allows patrons’ eyes to relax.
Good lighting benefits everyone. Every improvement someone makes is good for themselves and all their neighbors.
It is important at the Armadillo to be effective in highlighting your work, avoiding visual distraction, and allowing your customer’s eyes to relax and appreciate the quality of your work leading to more sales for you.
Our goal is for each of you to put the most attractive quality and quantity of light on your product, while keeping light beams contained within your display area.
At Armadillo, effective booth lighting should highlight your work clearly, avoid visual distraction, protect patrons’ eyes from glare, and help preserve the low-lit, warm, and cozy ambiance of the room.
Brighter and better are not the same. Bulbs that are too wide, too bright, or non-directional can create glare and make it harder for patrons to appreciate the work.
Each participating artist is expected to:
- Comply with all Armadillo and City of Austin safety requirements.
- Keep light on the art and away from aisles, neighbors, and customers’ eyes.
- Block light beams from going over or around booth walls into neighboring booths or aisles.
- Avoid eye bite and glare on and around the artwork/merchandise and in the aisles.
- Reduce the level of light bleed that illuminates the ceiling.
- Use an effective configuration of recommended bulbs, fixtures, and mountings.
- Use the ACB Wiring Guide.
- Keep it safe.
| Do | Do Not |
| Do Use directional light sources and sufficient cowling on fixtures to control the beam. | Do Not Use non-directional light sources. |
| Do Use recommended bulbs, fixtures, and mountings that help contain light within your display area. | Do Not Use globe / A-type bulbs, flat panel lights, or other bulbs that spread light everywhere. |
| Do Use high CRI bulbs, 90 or more, to help your colors stand out. | Do Not Use standard or low CRI LED bulbs. |
| Do Use bulbs under 600 lumens to reduce hot spots on artwork. 500 lumens is ideal. | Do Not Use bulbs over 600 lumens or with beam spread over 40 degrees. |
| Do Use bulbs with a beam spread of 40 degrees or less. | Do Not Use PAR30 bulbs in swing-arm lamps, above wall top level, or aimed at a wall near an aisle. |
| Do Use swing-arm lamps with PAR20 bulbs on wall ends at aisles and on panels along your front perimeter. | Do Not Use back wall mounted lights to illuminate the front and center areas of a corner booth. |
| Do Check whether your track mounts place bulbs above or below your wall top level. | Do Not Aim lights at the aisle, over wall tops, at the ceiling, or into neighboring booths. |
| Do If your bulbs are above wall top level, take extra precautions to block beam edges above your wall. | Do Not Aim track lights mounted on your front perimeter at any sidewall. |
| Do Check all lighting equipment before move-in to make sure components are present, safe, and working properly. | Do Not Use under-shelf lighting that casts glare into the aisles at eye level unless you add sufficient extra cowling to block the misdirected light. |
| Do Walk around your booth during set-up and again before opening to check for light shining over walls or into aisles. | Do Not Mix Kelvin temperature bulbs in the same area. |
| Do Have an ample support system to provide stability for lighting components. | Do Not Bring attention to lighting components |
Good booth lighting should attract the customer’s eye to your work, not to the lighting itself. These concepts will help you understand what we are trying to achieve and what we are trying to avoid.
Eye Bait
Eye bait is everything you do to attract the customer’s eyes to your work. Your goal is to create an alluring presentation that allows customers to focus their attention on your display long enough to appreciate the originality, skill, workmanship, and care that went into creating your merchandise.
Effective lighting highlights the quality and appeal of your presentation. Your lighting must allow the customer’s eyes to be comfortable while approaching your work. Your lighting fixtures should mostly disappear while their effect makes the artwork glow and helps illuminate the room.
Eye Bite
Eye bite is any unintended lighting effect that causes the eye to divert. Just as eye bait makes the patron’s eyes comfortable and attracts them to your work, eye bite irritates the eyes and turns them away from your display.
Under our low-light conditions, catching the business end of a light bulb right in the eye is a noticeable and discomforting experience. Eye bite can reduce customer interest in your display. Most eye bite can be reduced significantly, but rarely eliminated entirely.
Glare
Glare is one of the most important forms of eye bite to control at Armadillo. Glare can happen when light beam edges spill into aisles, bulbs shine over wall tops, bulbs are too wide and/or too bright to be effective, or non-directional bulbs cause too much light to spill.
This glare is not comforting to patrons’ eyes and can make it harder for them to appreciate the quality of the artwork.
| Concept | What It Means | What to Watch For |
| Eye Bait | Lighting that attracts customers’ eyes to your work and makes the artwork glow. | Light focused on the art, comfortable approach, fixtures that mostly disappear. |
| Eye Bite | Unintended lighting effects that irritate the eye or pull attention away from the display. | Visible bulbs, fixture vents, misdirected light, hard shadows, distracting reflections. |
| Glare | A strong form of eye bite caused by uncontrolled or excessive light. | Light spilling outside the intended display area. |
| Controllable Distraction | Visual distractions you can reduce through better lighting choices and configuration. | Beam spread, beam angle, cowling, side bleed, back leakage, and fixture placement. |
Common Sources of Eye Bite and Glare
- Uncontrolled beam angle
- Misdirected light
- Side bleed
- Back light leakage through fixture vents
- Too much light on a product, especially on a high gloss surface
- Hard beam edges on halogen vs. soft beam edges on LED
- Distracting shadows and reflections
- Miscellaneous sources, such as facility lighting or neighboring booth lighting
To reduce eye bite, pay attention to beam spread, angle of beam projection, beam control, cowling, fixture placement, shadows, reflections, and whether light is spilling outside your intended display area.
We know eye bite cannot be eliminated completely. We want artists to endeavor to put their best light focused on their work, while containing beam spread within and around their booth.
Please pay attention to these variables to get better performance from directional light sources. These are the main factors that affect how your light behaves, how well it highlights your work, and how much eye bite or glare it may create.
Your current lighting fixtures that worked well with a directional halogen bulb may not be effective in controlling beam spread with an LED bulb. If you’re going to switch bulbs, please capture that beam.
| Variable | What It Means | What to Watch For |
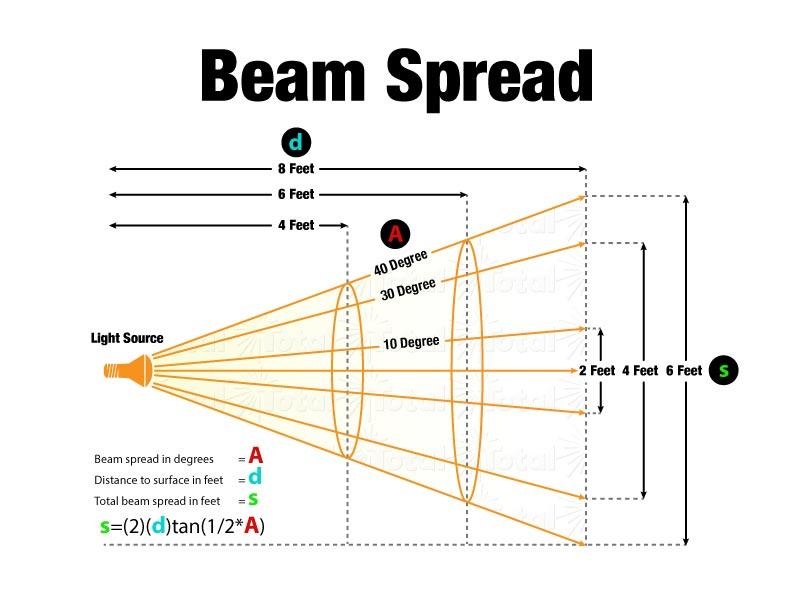
| Angle | The degree of light spread emitting from a bulb. | Wider beam spread is harder to control. Use bulbs with a beam spread of 40 degrees or less. |
| Beam Edge | The edge of the light beam as it falls on the artwork or display area. | Directional halogen bulbs are highly effective at controlling beam spread because they create a hard cut-off edge. LED bulbs generally have softer edges and require additional cowling to contain eye bite and side bleed. |
| Direction | The angle of strike as the light beam hits the artwork. | Do not aim lights toward aisles, over wall tops, toward the ceiling, or into neighboring booths. |
| Distance | How much space a light beam has available to spread out on the artwork. | If the light source is too close to the work, the beam can become too intense in one area and create hot spots. |
| Intensity | The lumen output, or brightness, of the light. | Bulbs of 600 lumens or more can cause visual hot spots on artwork. 500 lumens is easier to manage. |
| Color | Kelvin temperature and color quality. | Keep Kelvin temperature consistent in the same area. Use LED bulbs with high CRI values, 90 or more, to help colors stand out. |
| Cowling | The shield around the sides of the bulb or fixture that helps control the beam. | LED bulb use requires much more efficient cowling than directional halogen use. Use enough cowling to block side bleed, back leakage, and light spill into aisles or neighboring booths. |
Every booth is required to control beam spread in order to light up the artist’s own work without spilling offensive light into neighboring booths, aisles, and/or the ceiling.
With the growing popularity of LED bulbs, we have noticed an increasing amount of spillage from uncontrolled beam spread. If you’re going to switch bulbs, please capture that beam.
Your current lighting fixtures that worked well with a directional halogen bulb may not be effective in controlling beam spread with an LED bulb.
Directional halogen light bulbs, including narrow flood lights and spot lights, are highly effective at controlling beam spread with little or no cowling. These have a light-emitting source deep within the bulb structure and a parabolic reflector to focus beam spread. The intense light has a hard cut-off edge.
LED bulbs generally have different characteristics because the light-emitting source is on or very near the face of the bulb, and parabolic reflectors are not used to control the beam in the same way. This design feature does not allow for hard cut-off edges.
Uncontained spill from soft edges, or side bleed as we call it, is counter-productive in our Armadillo lighting ambiance. Hard edges make managing unwanted glare so much easier.
Solution:
LED bulb use requires much more efficient cowling than directional halogen use.
Adding Cowling to Existing Fixtures
When using LED bulbs, cowling must be effective enough to control the softer beam edge and side bleed. Because the light-emitting sources on LED bulbs are on or near the face of the bulb, the cowling must catch the ray from the furthest emitter on the opposite side in order to control the beam.
Keep these things in mind:
- Aesthetics: Don’t let your cowling be visually distracting. Be sure it is the same color as your fixtures and tidy. The most effective lighting fixtures seem to disappear.
- Safety: Cowling should not be flammable or loose. The last thing you want during a sale is a cowl falling on a customer. Even though LED bulbs generally run cool to the touch, please avoid allowing any flammable materials in contact with any electrical fixtures.
- Effectiveness: Keep the beam where it needs to go, highlighting art without spill, eye-bite, or unwanted glare.
Helpful Links:
VOLT Factory Direct Retail: Beam Angle Information
https://www.voltlighting.com/article-landscape-lighting-bulbs-getting-to-know-them/p/article-light-bulb-get-to-know
Total Track Lighting: Beam Spread Calculator / Chart
https://www.totaltracklighting.com/calculate-beam-spread-of-light.html
Easy Light Bulbs: Beam Angle Guide
https://www.easy-lightbulbs.com/lighting-guides/beam-angle/
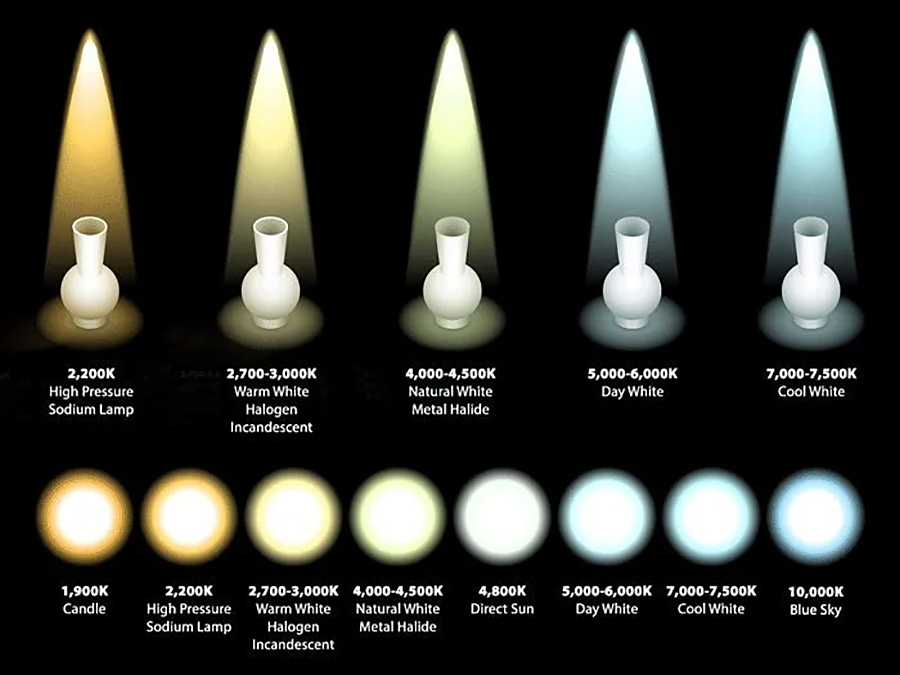
Kelvin temperature describes the color appearance of light, from warm yellow tones to cooler blue tones. For reference, true direct sunlight outdoors is about 4,600K.
Use the chart below as a general guide when choosing lighting for your work.
| Kelvin Temperature | Common Package Language | General Appearance | Often Works Well On | Notes |
| Warm Light: 2700K to 3000K | “Soft White” | Slightly yellow | Fabric, wood, or paper | Typical household lighting. Reduces visibility of flaws on surfaces. Comfortable on the eye. |
| Natural Light: 4000K | May be labeled “Natural Light” or “Cool White” | Truer white | Metals, glossy glazes, and paint | Typical gallery lighting. Shows some flaws on surfaces. Not discomforting to the eye. |
| Day White: 5000K | Often called “Stark White” | Slightly blue | Work where subtle color differences need to be seen | Typical for a medical examination room. Easily shows flaws on surfaces. Can be discomforting to the eye. |
| Cool Light: 7000K | “Daylight” | Very blue | Specialized lighting only | Shows extremely subtle color differences. Brings out minor flaws on surfaces. Harsh on eyes. |
Important: Do not use a mix of Kelvin temperature bulbs in the same area. Mixing 3000K and 5000K can make an unattractive green light.
Natural Light LED PAR20 Lamp, 500 Lumens, 7 Watt, 3000 Kelvin
https://www.1000bulbs.com/product/224839/PLT-12544.html
Natural Light LED PAR20 Lamp, 500 Lumens, 5 Watt, 3000 Kelvin
https://www.1000bulbs.com/product/221937/PLTS-12025.html
Natural Light LED PAR20 Lamp, 500 Lumens, 5 Watt, 4000 Kelvin, 2 Pack
https://www.1000bulbs.com/product/222337/IRT-10379.html
Showing Only Black — White Components Are Available
If configured correctly, these components can work at the Armadillo.
Track
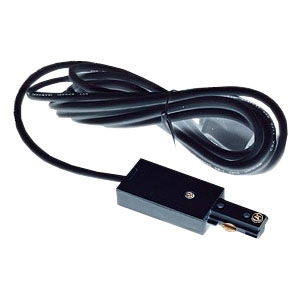
Track End Power Feed and Cord – BLACK
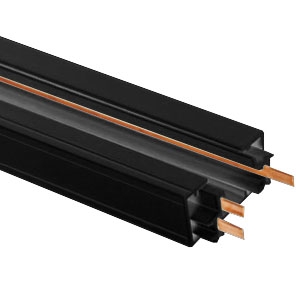
4′ Black Power Track4′ Black Power Track
Track Fixtures for PAR20 Bulbs
Best price for quality
Step-down Cylinder
https://www.1000bulbs.com/product/173520/PLT-10220.html
Best Alternative
Continental Step Cylinder
https://www.1000bulbs.com/product/4165/NORA-NTH103B.html
PAR20 Bulbs
LED
Warm Light – 2700 to 3000 Kelvin
90+ Lighting
500 Lumens – 5.5 Watt – 2700 Kelvin – LED PAR20 Lamp
50 Watt Equal – 40 Deg. Flood – Dimmable – 92 CRI – 120 Volt – 90+ Lighting
https://www.1000bulbs.com/product/219026/PLT-11818.html. $2.82
PLT – 500 Lumens – 7 Watt – 3000 Kelvin – LED PAR20 Lamp
50 Watt Equal – 40 Deg. Flood – Dimmable – 120 Volt – PLT Solutions – PLT-11140
https://www.1000bulbs.com/fil/products/203856
500 Lumens – 7 Watt – 3000 Kelvin – LED PAR20 Lamp
Euri 50 Watt Equal – 40 Deg. Flood – Dimmable – 120 Volt – sold by 2 Pack – Euri Lighting EP20-7W6000e-2
Natural Light – 4000 Kelvin
PLT Natural Light – 500 Lumens – 5.5 Watt – 4000 Kelvin – LED PAR20
50 Watt Equal – 40 Deg. Flood – Dimmable – 90 CRI – 120 Volt – PLT Solutions – PLTS-12026
https://www.1000bulbs.com/product/221939/PLTS-12026.html
Stark White Light – 5000 Kelvin
PLT 500 Lumens – 7 Watt – 5000 Kelvin – LED PAR20 Lamp
50 Watt Equal – 40 Deg. Flood – Dimmable – 120 Volt – PLT Solutions – PLT-11142
https://www.1000bulbs.com/fil/products/203858
Euri 500 Lumens – 7 Watt – 5000 Kelvin – LED PAR20 Lamp
50 Watt Equal – 40 Deg. Flood – Dimmable – 120 Volt – sold by 2 Pack – Euri Lighting EP20-7W6050e-2
https://www.1000bulbs.com/product/222346/IRT-10369.html
Swing Arm Lamp
Alvin G2540-B, black with a DOUBLE BAFFLE for glare reduction.
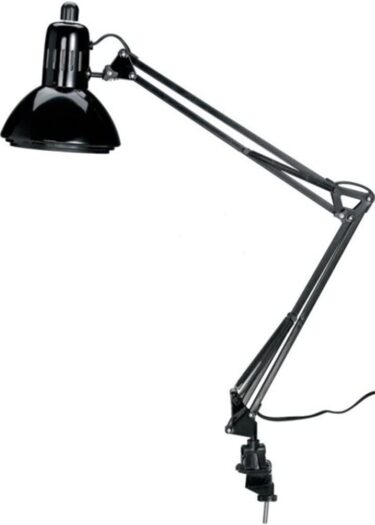
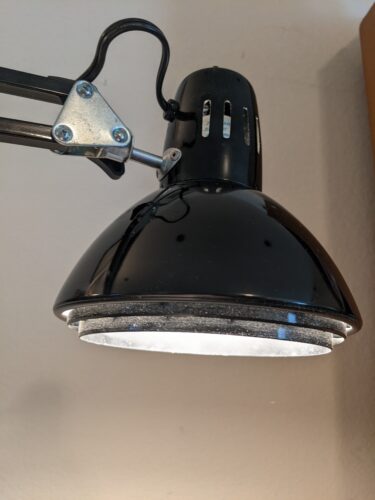
If you use a halogen 40 Deg. flood with a flat nubby head, you won’t need the double baffling. With any other type of bulb, the double baffling is the best solution to reduce side beam spread in critical areas.
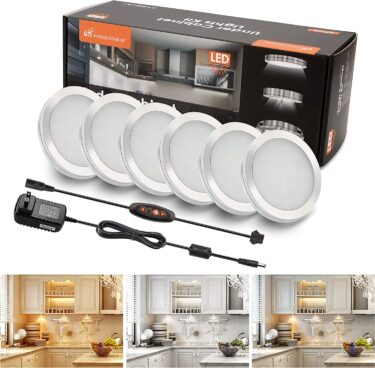
Undershelf Lighting
6 pack with 14 brightness settings & 3 different Kelvin temps
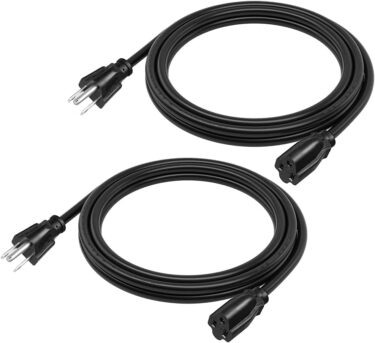
14AWG Power Cords
Correct gauge and configuration for Armadillo use
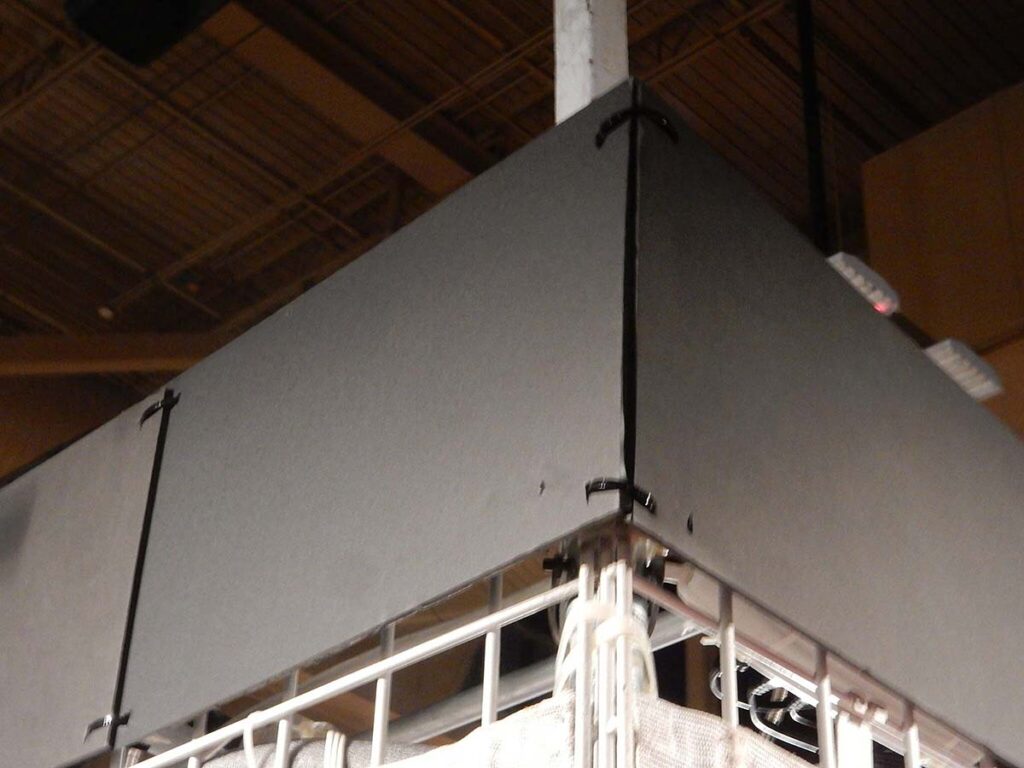
Goal: To have an even spread of light on my wall top so my items that are hung high have the best visual impact.
Means: Raising light fixtures.
Issue: Light beam passes over wall top to cause problems in the aisles and for neighbors.
Possible Solution: Lightweight nearly invisible black matte board height extender panels can be seen at the seams (arrows). These contain the tops of light beams. Remember to provide a finished look on both front and back sides as to avoid visual distraction to neighbors.
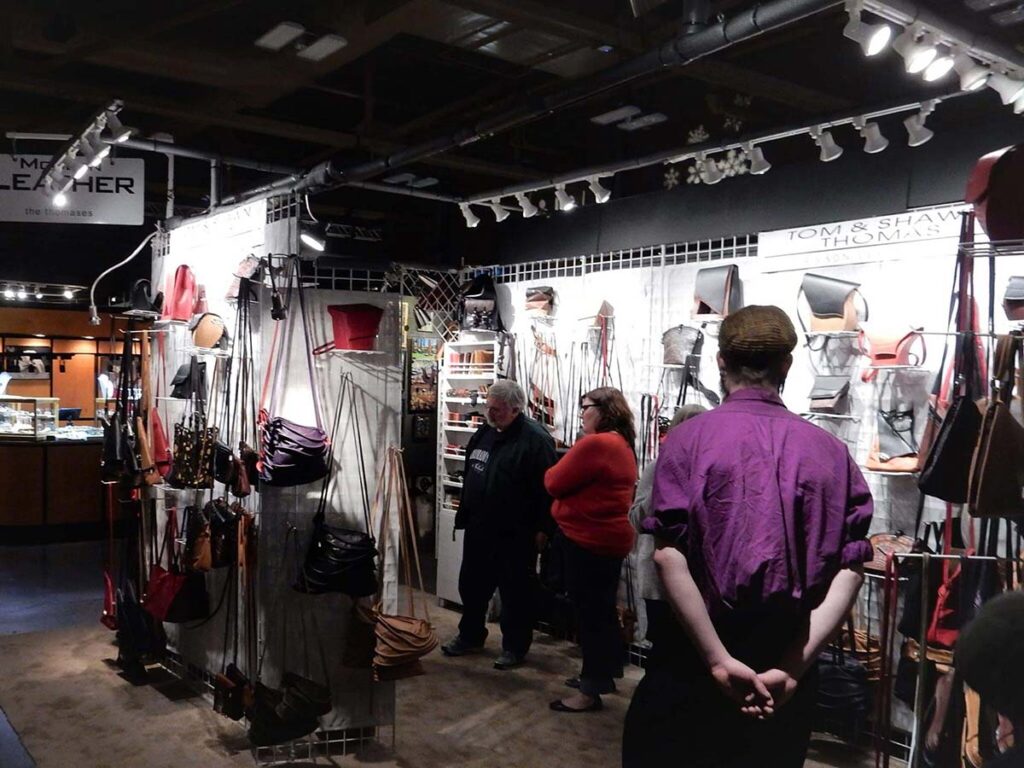
Goal: To have an even spread of light on my wall ends at aisle so my items displayed there have better visual impact.
Means: Aiming a front perimeter track light at the area.
Issue: Large segment of the light beam is aimed into the eyes of approaching patrons causing major eye bite.
Possible Solution: Use two of the Alvin swing-arm lamps. One placed at tip of wall top, angled out and into the aisle, focused back into the upper wall. A second Alvin mounted 24” to 30” away from wall end, angled out and slightly toward back wall, and focused back on the lower segment of the wall end. The wall end will be well lit, and the light spill will hit the aisle at knee level. No eye bite.
Goal: To have an even spread of light on my aisle front display columns or single panel so my items displayed there have better visual impact.
Means: Aiming track lights and swing-arm lamps from various angles.
Issue: Misdirected light right in the face of approaching customers is counterproductive to sales.
Possible Solution: Use the Alvins here just like you would on the wall ends at aisle. Carefully aim light beams to avoid hitting aisles at eye level. Use bulbs with a tighter beam spread if needed.
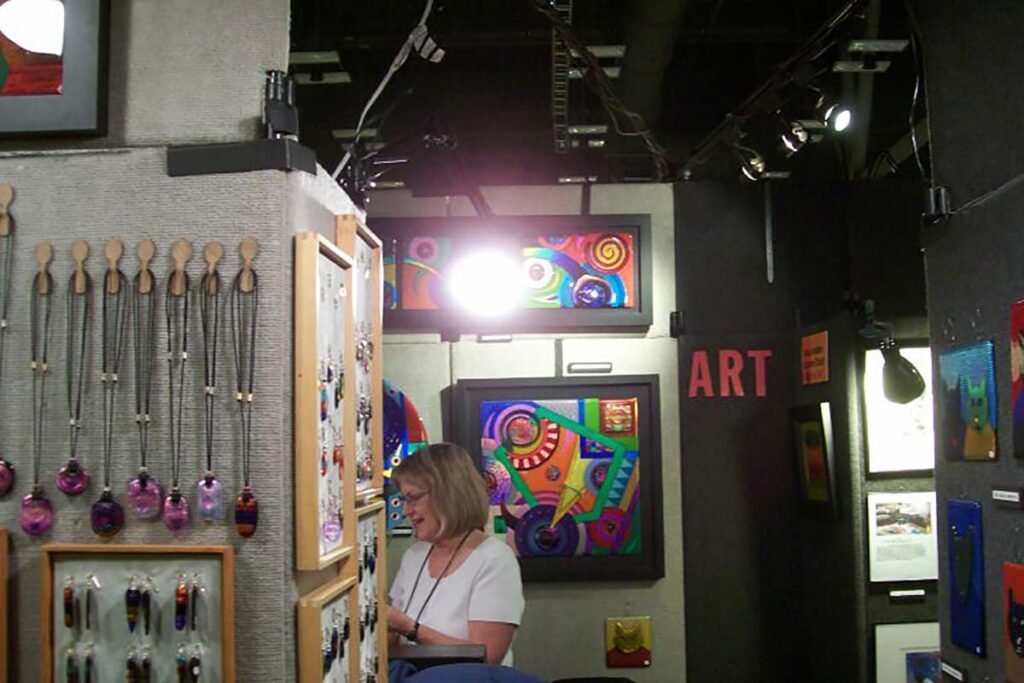
Goal: To have an even spread of light on the aisle side of my front corner display fixture, columns hanging items, or single panel so my items displayed there have better visual impact.
Means: Aiming track lights and swing-arm lamps from various angles.
Issue: Misdirected lights. Poor lighting on the side toward customer approach. The most common issue is customers see the shadow side while getting the light in the face.
Possible Solution: Extend 2×2 lumber truss out above and past the corner for mounting light fixtures in a position as to focus down and in on the corner. Use Alvins with directional bulbs so light falls on the aisle side of the display.
Hanging items, like the earring racks in the photo, are especially tricky as there is no close backstop to stop the light beam. Pay attention that the angle of strike so the light beam hits artwork at an effective angle toward the floor. Spotlight bulbs with very narrow beams may be needed in some cases.
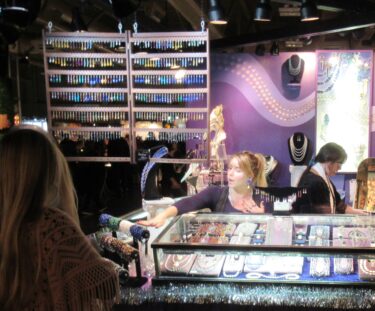
Goal: To have an even spread of light on my front perimeter mounted sign so it will have visual impact.
Means: Aiming Alvin swing-arm lamps from various angles.
Issue: Uneven light on the sign with misdirected light in the aisles.
Possible Solution: Consider moving your sign to an inside wall and adjust size as appropriate.
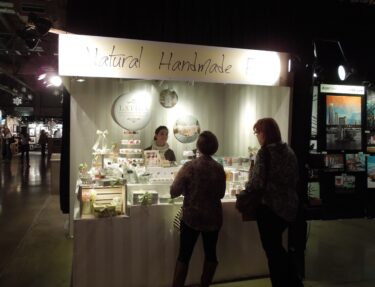
Goal: To add even light on areas to reduce distracting harsh shadows and make my shelves look better.
Means: Aiming more light from a distance at the area.
Issue: Just made the shadows look darker.
Possible Solution: Overlap light beams from different angles on wall and use undershelf lighting pods on dark shelves.
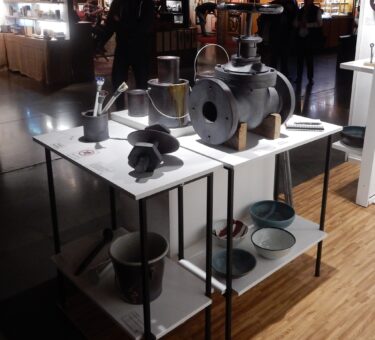
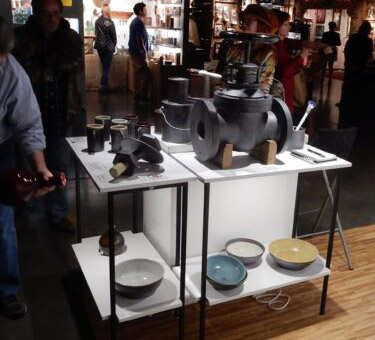
Goal: Use my existing fixtures with a change from halogen to LED bulbs.
Means: Switch bulbs.
Issue: Fixture cowl no longer effective to control beam edges.
Possible Solution: Attach non-flammable cowl extenders.
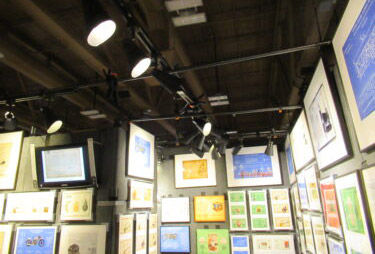
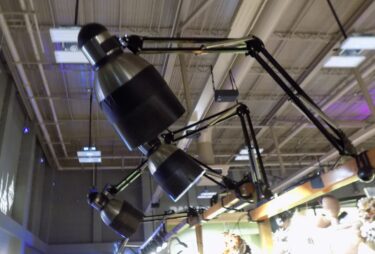
Please do not be a nuisance to your neighbor by allowing your lights to go over or around your walls.
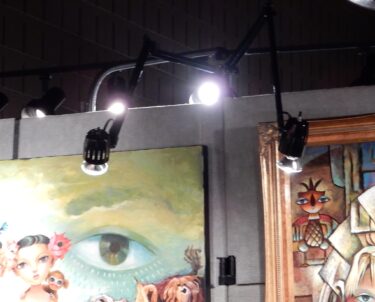
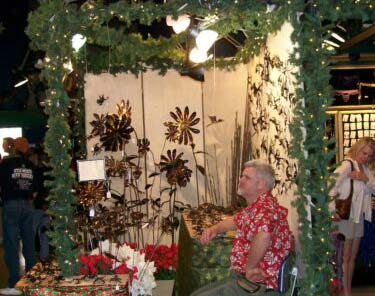
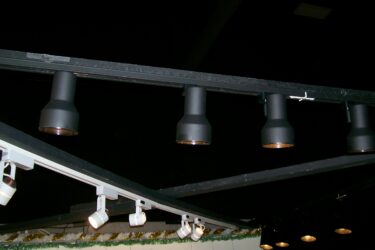
Eye Bite Warning: Do not aim a front perimeter track light at a side wall end on the aisle.
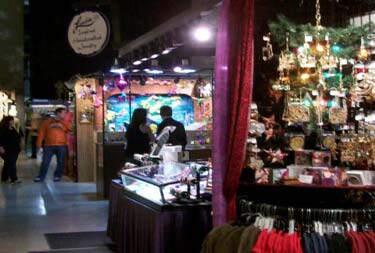
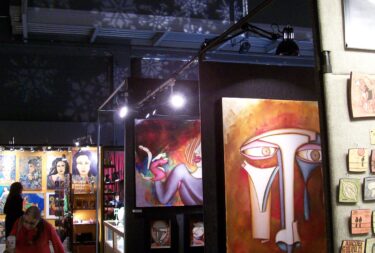
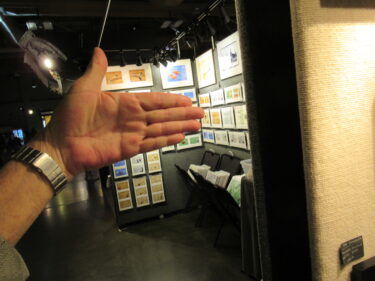
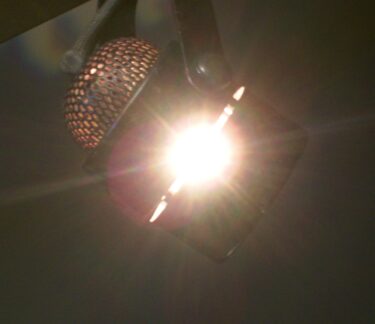
Eye Bite Warning: Standard MR16 bulbs in vented fixtures will bleed unwanted light out of the vent. Either buy unvented fixtures or use high-temperature automotive exhaust manifold paint on the bulb sides.
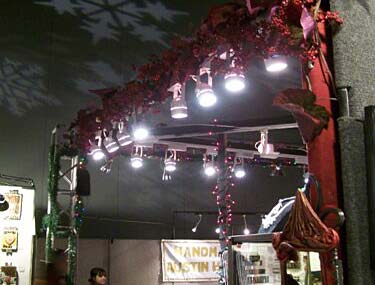
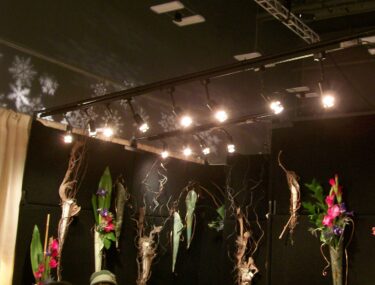
Eye Bite Warning: Using non-directional bulbs to light a corner display is counterproductive to sales.
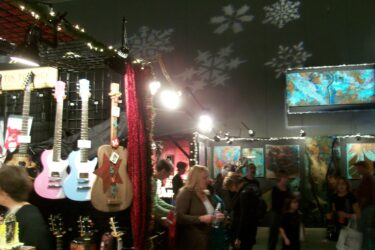
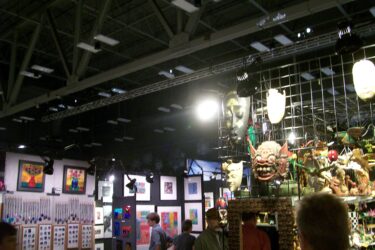
Eye Bite Warning: Avoid Non-Directional light bars
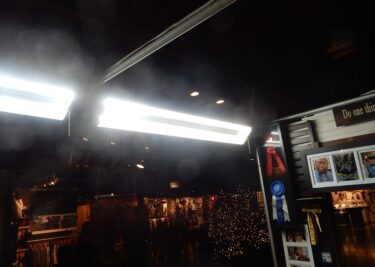
Lights mounted too close or there is just too much light in the booth makes it more difficult for patrons to appreciate the quality of the work.

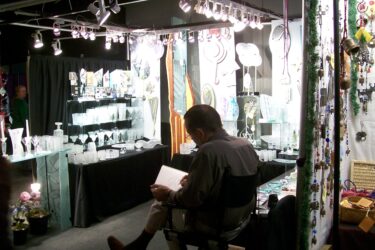
Example of a big improvement by removing a visual distraction:
Before & After
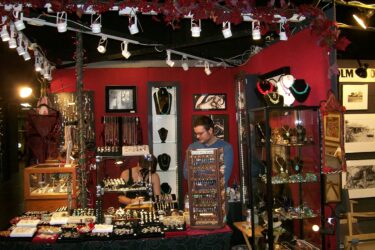
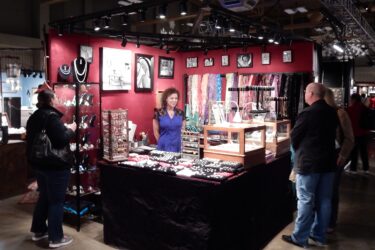
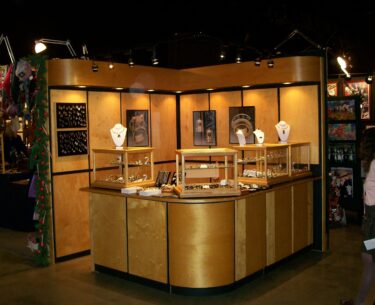
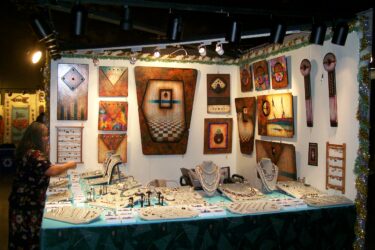
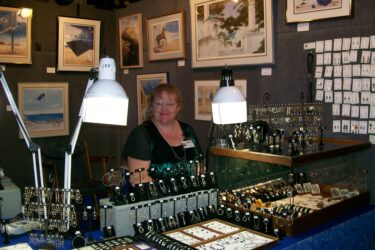
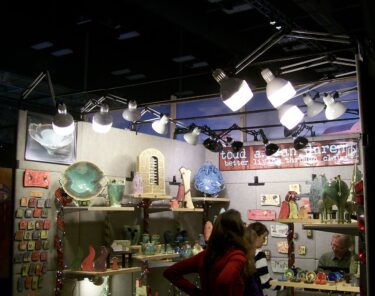
The overall effect of lighting at the Armadillo Christmas Bazaar, featuring dark ceilings, dimly lit aisles, minimum glare, and brightly lit artwork makes a huge difference in the sales potential for each individual artist.
This effect is achieved by having every participant follow Armadillo lighting standards.
Beam edges need to be made controllable. This can be accomplished by using bulbs of 500 Lumens or less with a 40-degree or less beam spread, fixtures with cowling, track lighting hung below the wall top, effective lighting angles, 32” arm lamps for wall surfaces closest to the aisles, and a larger number of fixtures selectively aimed. Some components work a lot better than others.
At the Armadillo, we require artists to use only lighting components that can be configured so that the bright part of any bulb cannot be seen at eye level from anywhere in an aisle, over a wall top, or in neighbor’s booth space.
Using ProPanel lighting components to create this effect can prove to be either very challenging or impossible, depending on the components used and the manner in which they are applied.
About ProPanel Lighting components at Armadillo:
ProPanel is well known for having excellent display panels and accessories ideally suited for use within a professional art tent in an outdoor setting. Their components also work well in an indoor facility with plenty of diffuse overhead lighting. Their panels, furnishings, and most accessories have been used with great success at Armadillo for years.
https://www.pinterest.com/propanels/pro-panel-booths-at-2016-armadillo-christmas-bazaa/
Their lighting components are different.
ProPanel lighting is carefully designed to work under a white tent top. It appears that their intention is to fill a need to illuminate the maximum amount of art display space with the fewest bulbs and the lowest power draw. Their components are well suited for that purpose.
Components designed for use under a white tent top or well-lit exhibition center can be counterproductive to the overall Armadillo lighting ambiance
ProPanel Lighting Components:
ProPanel Fixtures: These lighting fixtures are designed without beam spread limiting cowling because their system is intended to use the tent top to capture the beam spill and reflect it back in a diffuse manner, over the art. This design is not suitable for attaching additional cowling.
ProPanel Bulbs: These bulbs are designed with a wide 60-degree beam spread to cover more display space and an intensity of 1000 Lumens. These are difficult to use in the Armadillo environment because of high intensity and wide beam spread.
ProPanel Tracks: These track mounts are designed to stand tall, higher than wall tops, well up into the tent canopy to provide more distance for the beam to spread and more tent top reflection. Without a tent top to catch the beam, the light is prepositioned over the wall top, shining right into your neighbor’s space or an aisle.
Do not plan on using this type of track holder at the Armadillo unless you provide an additional light beam blocker as shown in the lighting tutorial section, Troubleshooting 1.
ProPanel Arm Lamps: (both single panel and/or double panel, both set length and/or telescopic)
These are designed to illuminate one or two panels from a position close to a display wall, right at the level of the wall top.
A few Armadillo artists have achieved some success with limited application lighting two-dimensional art and careful placement of these arm lamps.
This tricky application worked correctly when the artist aimed his side and back wall lights almost straight down, slightly tilted just a few degrees inward and away from the aisle. Lighting art near the wall ends at the aisles was the biggest challenge to get right.
Just a little change in the angle of the focus produces a different and undesirable effect allowing the light beam edge to spill into the aisle.
Generally, this lighting configuration and its components are not encouraged for use at Armadillo because of the limited application and the skill level needed to achieve the precise focus to keep the beam contained.
Occasionally, this approach may be appropriate for artist with 2D work with distinctive texture, such as carved paint, due to the effect that steeply angled light would have on the work. The best result would come from having enough fixtures to always point the light straight down as to avoid having to angle any of the beams sideways.
Recommended Alternatives:
Track Fixture
Fixture – Step-down Cylinder – Black $12.38 In stock 090823
https://www.1000bulbs.com/product/173520/PLT-10220.html
Swing Arm Lamp
Globe 32” $20.55 In stock 090823
LED Bulbs
3000K
PLT 500 Lumens – 5.5 Watt – 3000 Kelvin – LED PAR20 Lamp $2.72 In stock 090823
https://www.1000bulbs.com/fil/products/203856
4,000K
PLT 500 Lumens – 5.5 Watt – 4000 Kelvin – LED PAR20 Lamp $2.72 In stock 090823
https://www.1000bulbs.com/product/221939/PLTS-12026.html
Pre-Check: Please check with Bruce first if you are planning to use ProPanel lighting components at the Armadillo. Indicate the components that you want to use and how you plan to configure them to comply with Armadillo Lighting standards.